
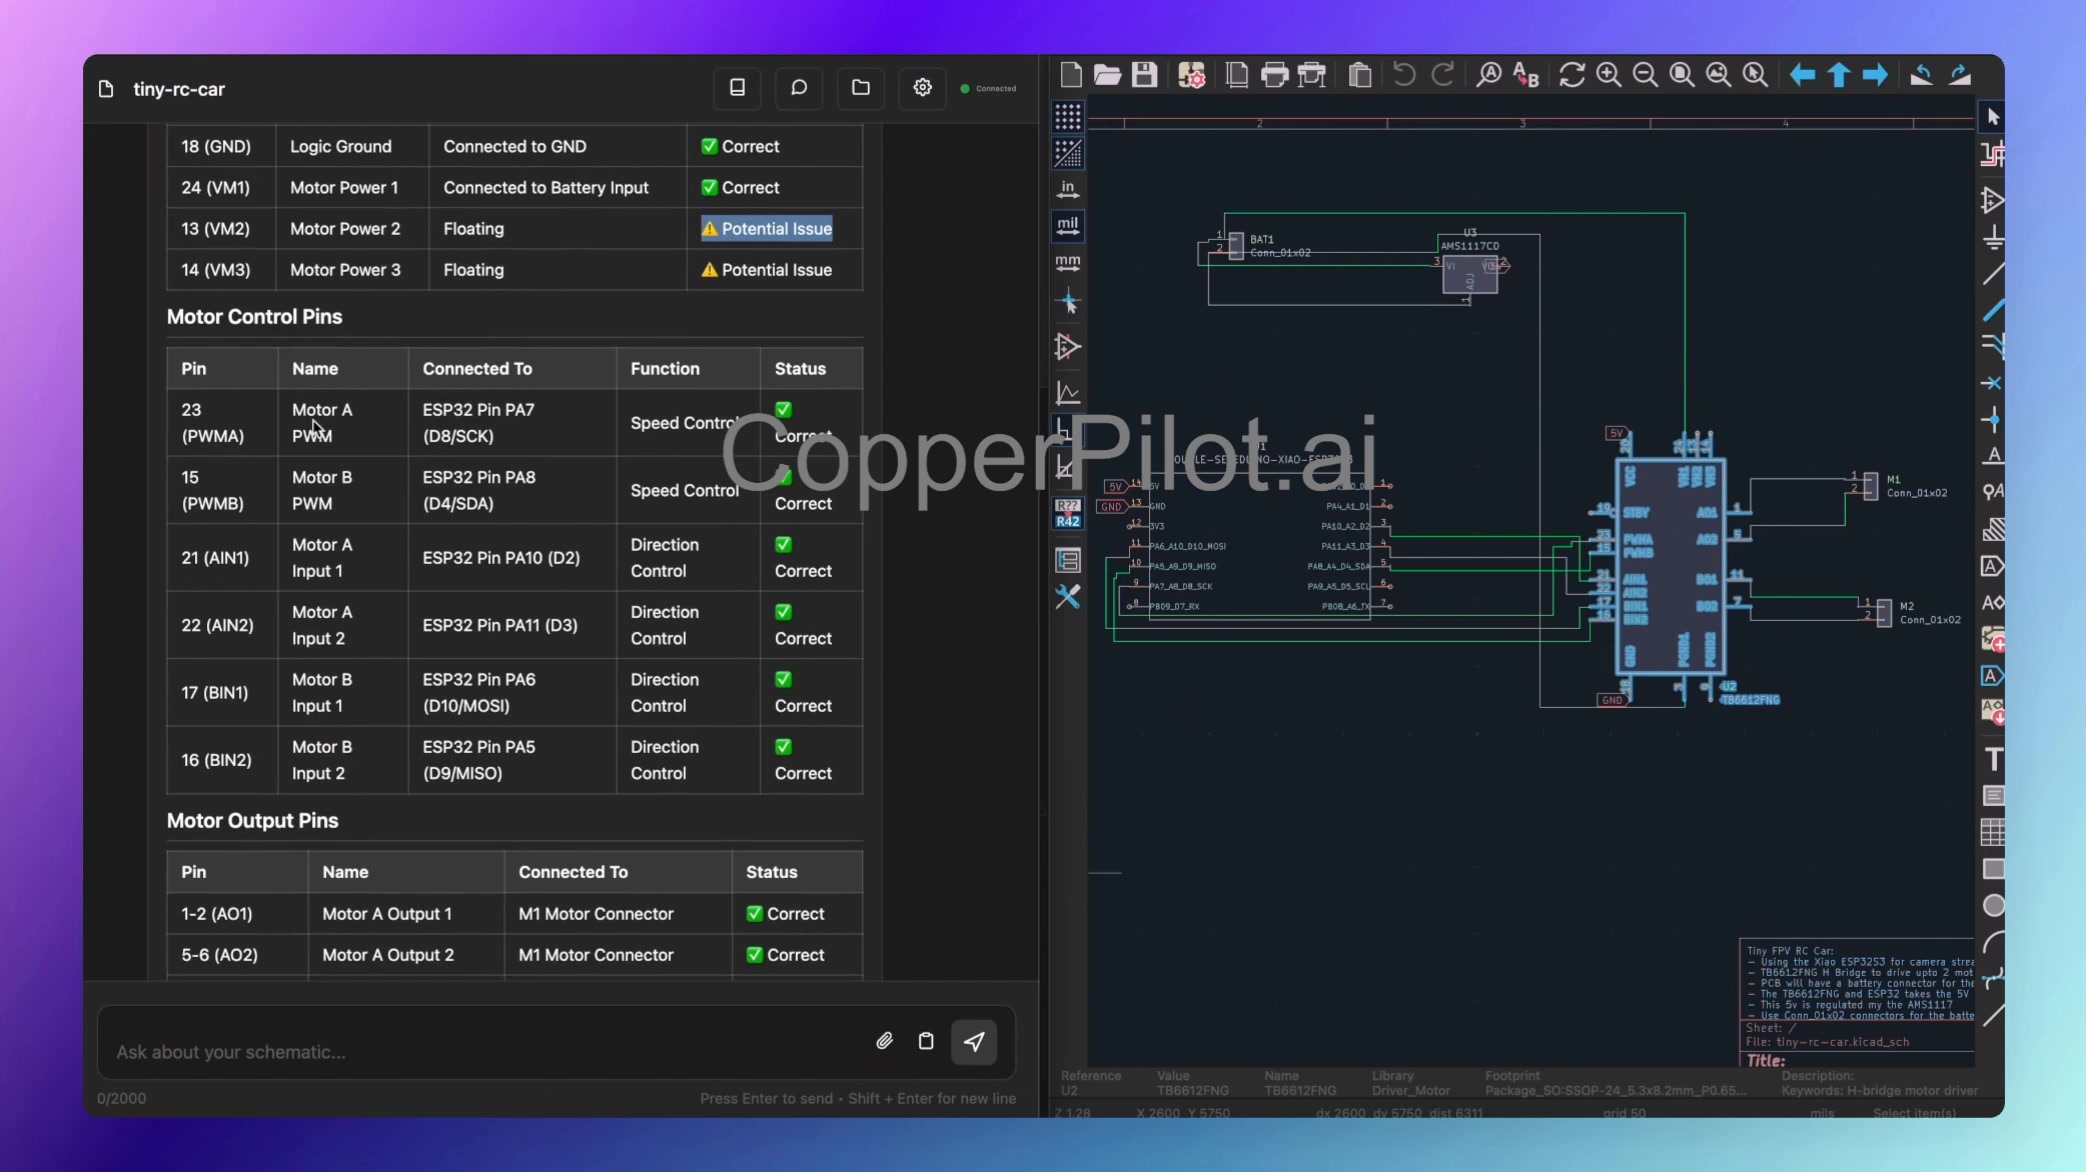
This tutorial walks through an FPV RC car build using CopperPilot as the project hub. You will move between schematic decisions, component context, and firmware notes without losing state.
Start in Research by capturing the drivetrain requirements: motor controller, battery range, radio link, and camera module constraints. Save the rationale so later design changes do not erase why you picked a part.
In Design, connect pin functions across the ESC, receiver, and microcontroller. CopperPilot helps you spot conflicts early—UART vs PWM mixes, insufficient regulator headroom, or GPIO shortages when you add extras.
Use the walkthrough video below as a supporting reference for the full build flow.
After assembly, move into Run to track firmware bring-up and test logs. When something fails on the bench, ask CopperPilot to relate the symptom back to schematic sections and recent changes.
FPV projects iterate quickly. Treat each revision as a named checkpoint so the copilot can diff what changed between “works in the garage” and “fails on the track.”